
Increase your revenue
Promotion dollars in your pocket with our revenue share program.

Build Packages
Events are one of the most highly searched content on the internet.

Increase your engagement
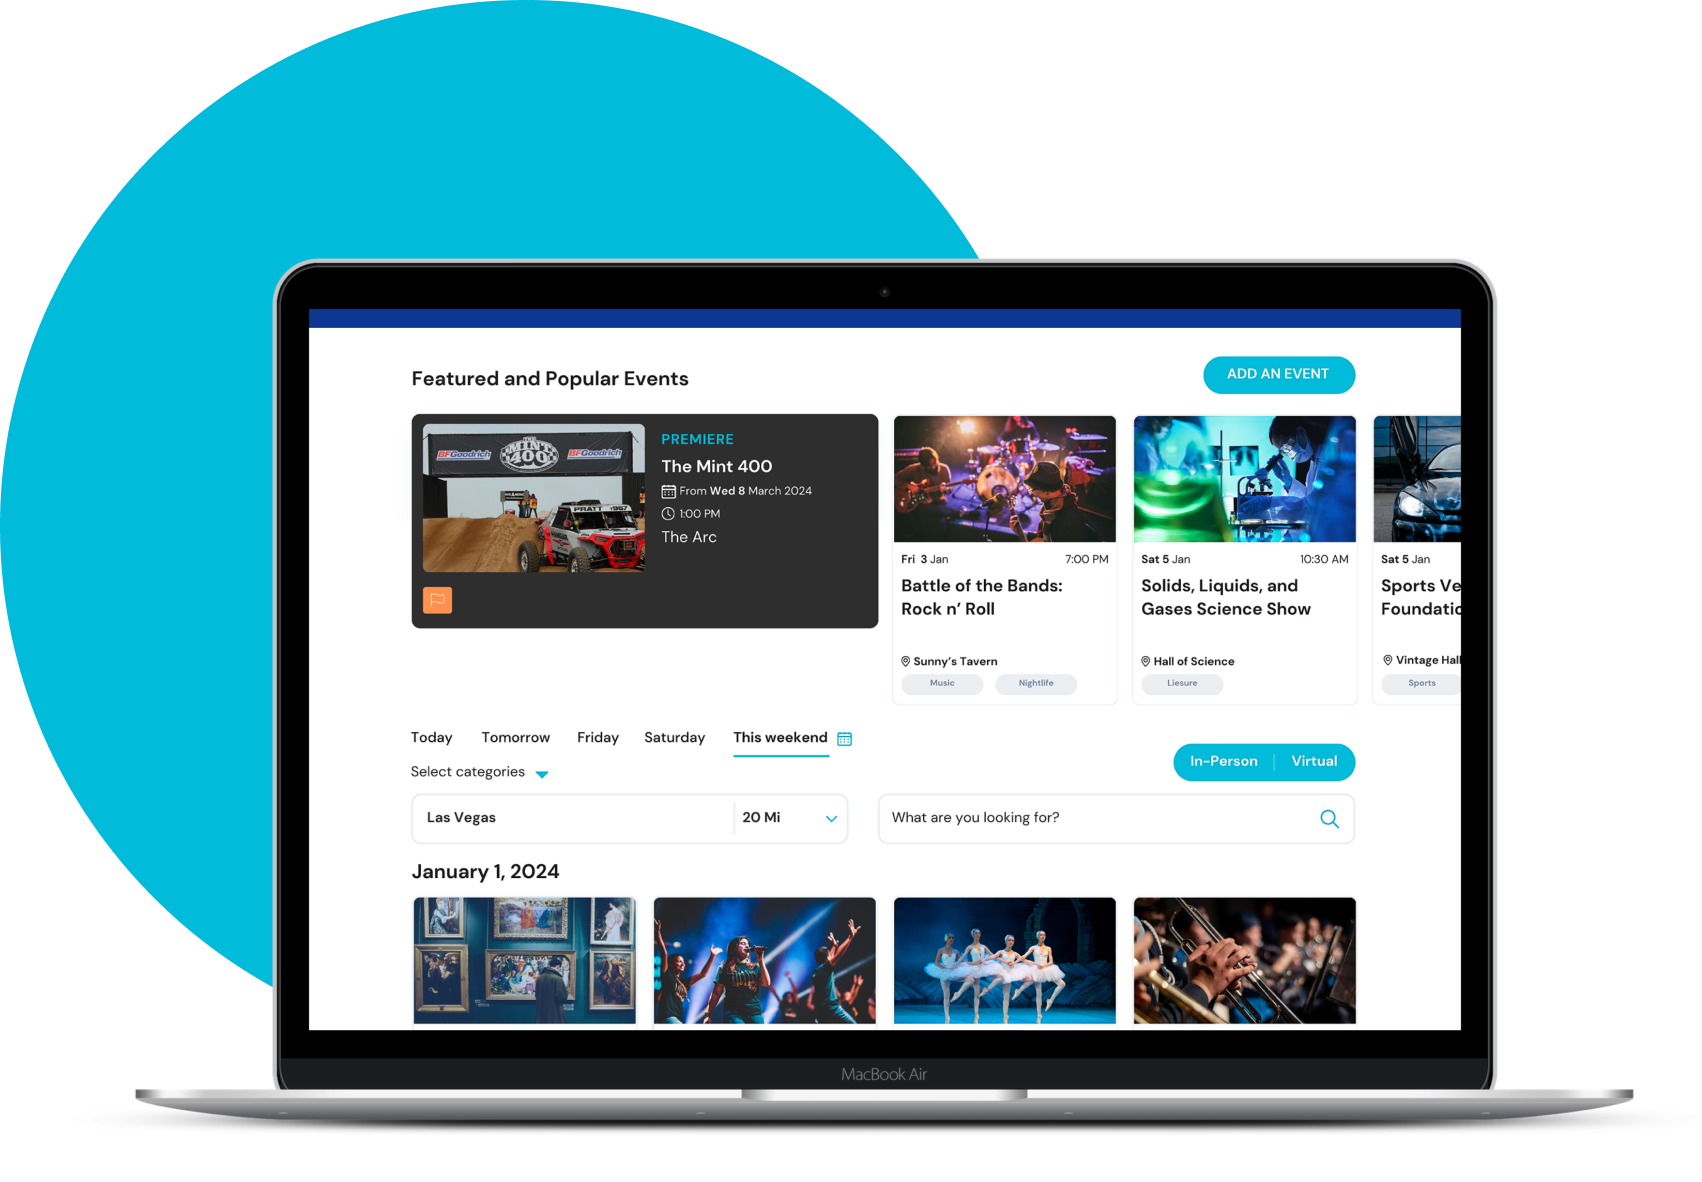
Your website can become the go-to place to discover events in your area.


Comprehensive listings
Allow local event organizers to submit and display events through our network of calendars.

High quality content
Events on all calendars are verified, tagged, and ready for engagement.

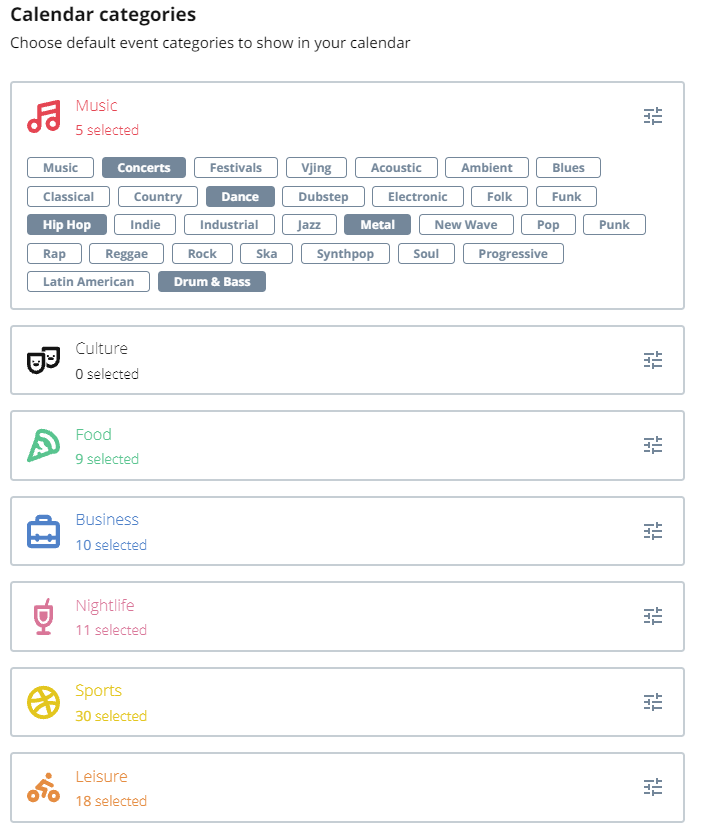
Custom categories
Only display the events that are relevant to your audience using custom category tags.

Easy embed
One-click embed for a responsive calendar widget that adapts to any section of your website.

Revenue share
Make a percent of the promotion dollars spent by event organizers who promote events through your calendar.

Customizable
Choose your city, colors, and size for your event calendar widget to match your website.
During the creation or after you have created your calendar, you will be able to customize the categories that appear on it. This allows for you to be able to cater to the type of audience that is coming to your calendar or remove events that you do not want to appear on it automatically. To do this while creating your event calendar you can select the categories that you do not want to appear on your calendar as seen below.
If you have already created your calendar and want to make this change, click on this help article to see how.
After creating your calendar, you may want to change some of the settings for your calendar, whether this is the website URL, the location, the radius, or which categories you allow on your calendar. These settings can be changed at any time. To make these changes, you can follow these steps:
- Sign in to your Events.com account under ‘Calendar’

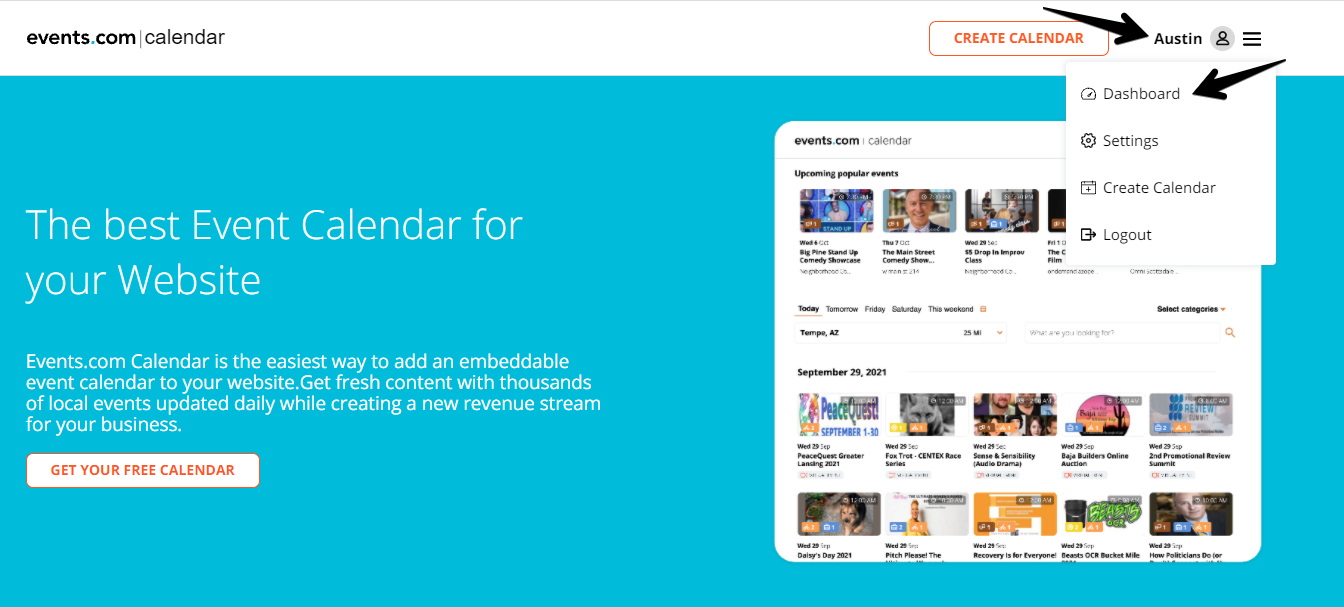
- Once in your account, in the upper right corner click on your name followed by ‘Dashboard’

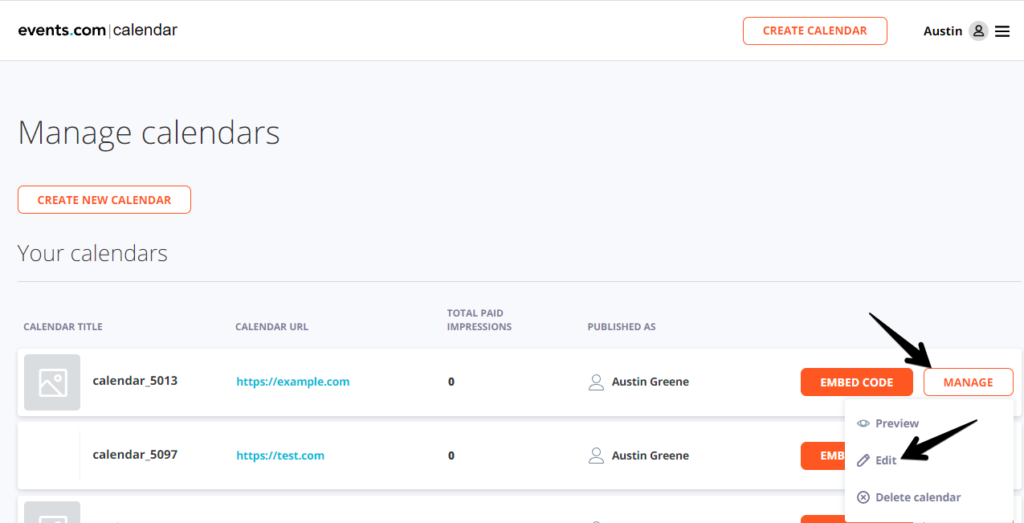
- In the list of ‘Your Calendars’, locate the calendar that you would like to change.
- Once located, you will click on ‘MANAGE’ followed by ‘Edit in the drop down menu

- After you have finished making the changes to your calendar, click ‘Save changes’ to finalize


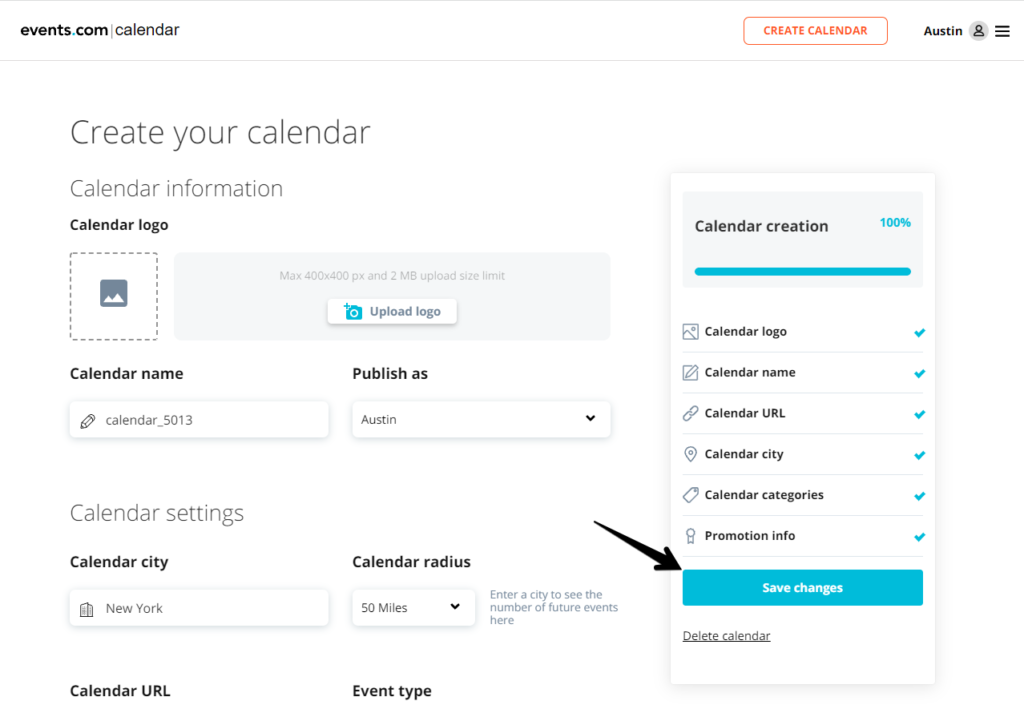
Once in there you will be able to make changes to anything that you may need. Be sure that once you have made those changes that you click save before leaving the page.
Your calendar will require you to have a Google API token so that the Google Map will display correctly. Once you have created your calendar, we will automatically provide you with a Google API token.
If you decide to use your own Google API token, you will need to create your own Google Maps API token and whitelist it on your website. You can use this article to help guide you through this process:
https://developers.google.com/maps/documentation/javascript/get-api-key
Once you have created and enabled your token, you will need to replace it in the embed code. To do this you will place your token in the last line of the script.
<meta name="viewport" content="width=device-width, initial-scale=1" />
<script src="https://unpkg.com/vue@2.6.12/dist/vue.min.js" />
<script src="https://cw.stagingcms.wpengine.com/edc-calendar.min.js" />
<script src="https://maps.googleapis.com/maps/api/js?key=‘YOUR TOKEN HERE’&libraries=places" />
The sidebar widget allows you to be able to add a small version of the calendar on any page outside of the calendar. This will help to promote your calendar on other pages and drive more traffic to the calendar. The sidebar widget will display a few events where users can see some popular upcoming events, go to the full calendar, or add an event directly from the widget.
To install this widget on any other pages outside of the calendar, you first need to gather your snippet by following these steps:
- Sign in to your Events.com account under ‘Calendar’
- Once in your account, in the upper right corner click on your name followed by ‘Dashboard’
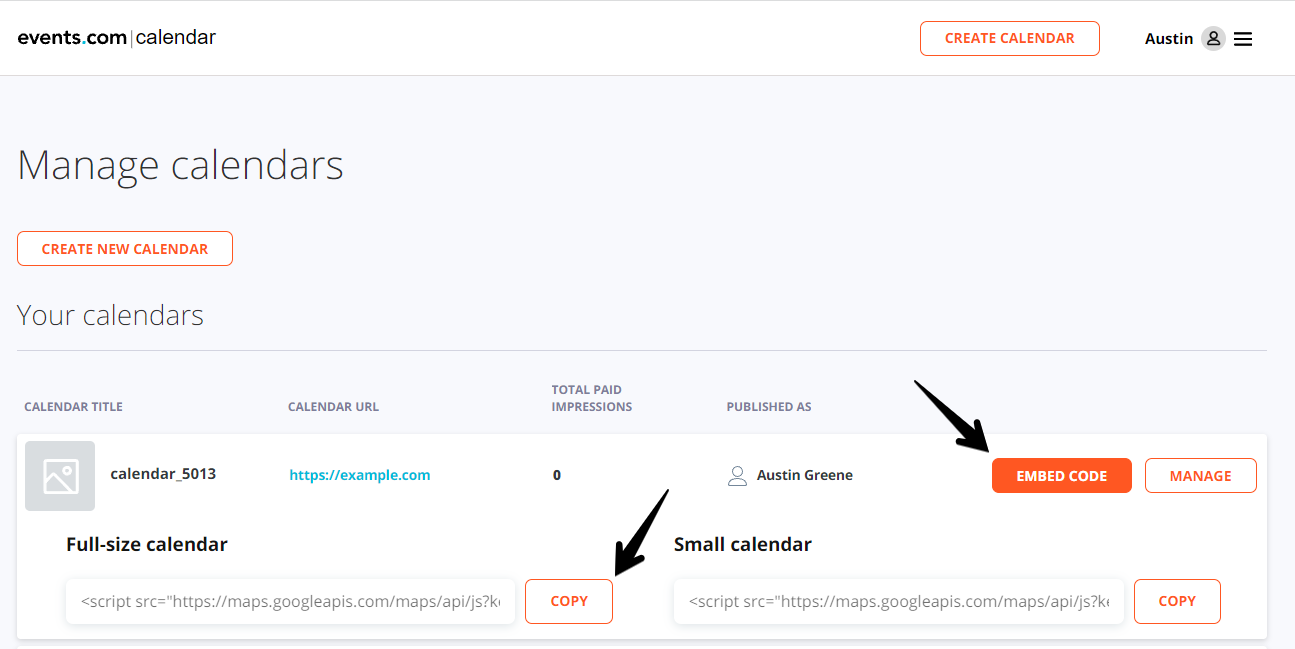
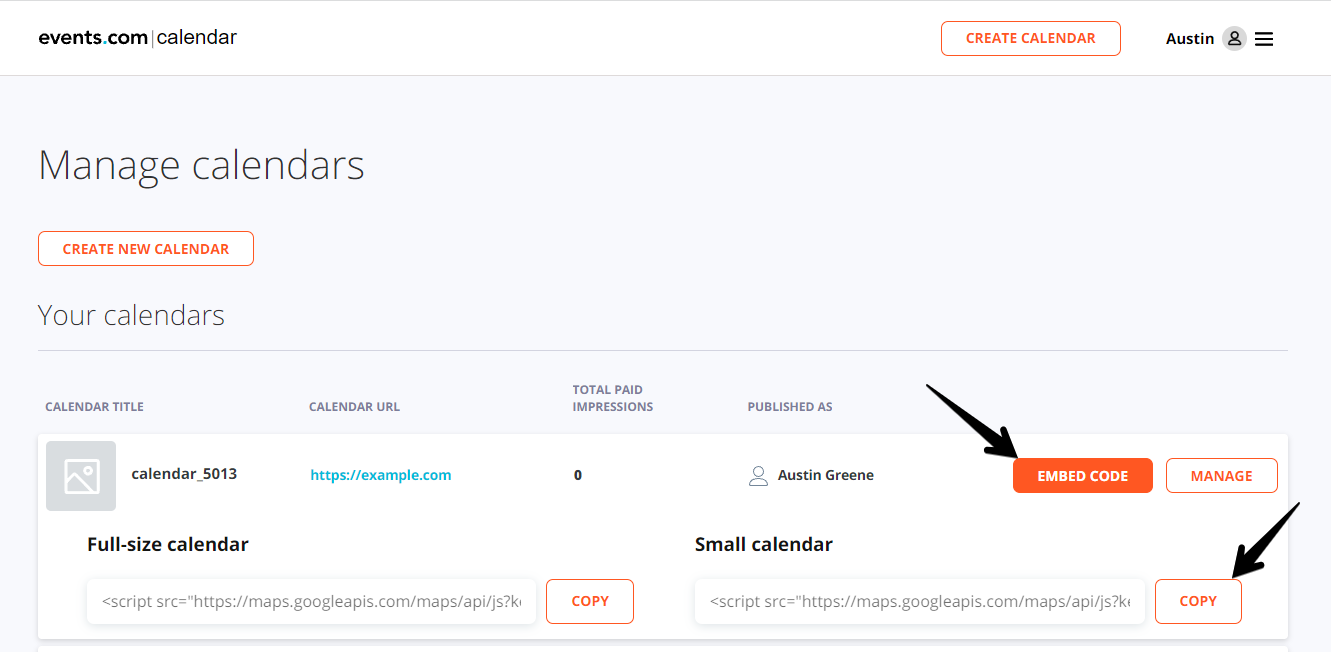
- In the list of ‘Your Calendars’, locate the calendar for which you are looking for and click on the ‘EMBED CODE’
- Finally, under the ‘Small calendar’ you will click on ‘COPY’ to gather your embed code

Once you have copied your embed code, you will need to insert the following snippet into your website.<meta name="viewport" content="width=device-width, initial-scale=1" /> <script src="https://unpkg.com/vue@2.6.12/dist/vue.min.js" /> <script src="https://cw.stagingcms.wpengine.com/edc-calendar.min.js" /> <script src="https://maps.googleapis.com/maps/api/js?key=‘YOUR TOKEN HERE’&libraries=places" />
To have this small version of the calendar be interactive, you will need to install the following script:
The snippet you will use for this is:<edc-calendar token="TOKEN" interactive="true" width="WIDTH" height="HEIGHT" ></edc-calendar>
Once you have installed the script, you will then need to decide which ‘WIDTH’ and “HEIGHT’ will best fit your website. We recommend the following combinations”
300×600
300×280
300×100
728×90
As required to be able to earn revenue from the revenue share program, you will need to add a navigation link that will take users directly to the event calendar page. You can prompt users to go to this page by calling it either “Event Calendar”, “Community Calendar”, “Local Events” or some combination of this to alert them to this section. From there, users will be able to see events happening in the area or add an event to the calendar.
Once you have created your calendar, you will have access to your new embed code. This embed code will include a personalized Google API Token and calendar token. If you have your own Google API token, click on this article to see how to replace it. To find your embed code, follow these steps:
- Sign in to your Events.com account under ‘Calendar’
- Once in your account, in the upper right corner click on your name followed by ‘Dashboard’
- In the list of ‘Your Calendars’, locate the calendar for which you are looking for and click on the ‘EMBED CODE’
- Finally, under the ‘Full-size calendar’ you will click on ‘COPY’ to gather your embed code