How do I customize my confirmation emails?
Last Updated: Jun 21, 2022 10:47AM PDT
The Events.com platform allows you to set up customized confirmation emails for your attendees so that you can provide them with pertinent information, specifically about YOUR event! You can also craft a customized message that appears when they complete their purchase. You can add images, links and all the information you want!
1. Log In to your Events.com account.
2. Go to the Events page on your Organizer navigation. Choose the event for which you want to add customized confirmation emails.
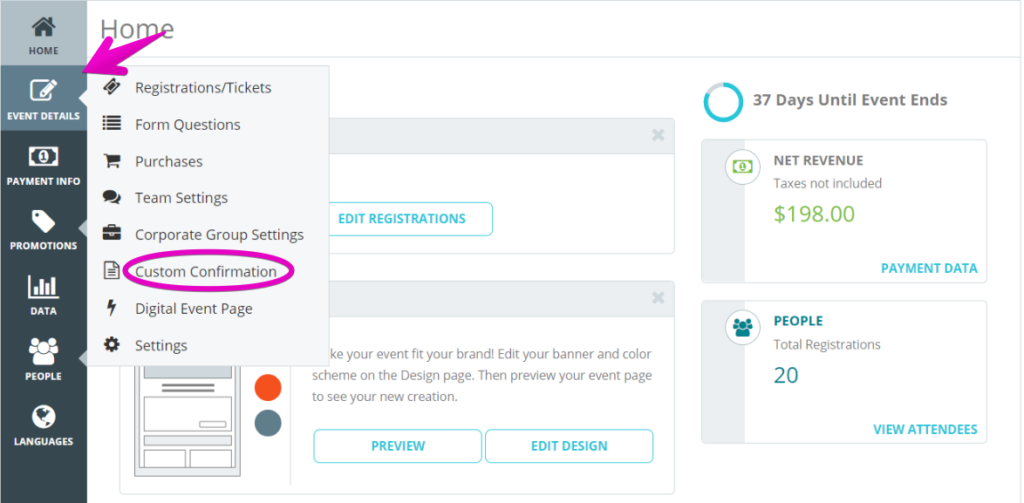
3. Click on EVENT DETAILS in the left side navigation, and then select Custom Confirmation.

4. Here, there are two sections: CONFIRMATION PAGE and CONFIRMATION EMAIL.
The CONFIRMATION PAGE is the Page that appears right after the transaction was successful.
The CONFIRMATION EMAIL is the custom text that will be added to the email the Event Goer will receive once they have completed their transaction.
5. Add text and images
- Add text (up to 3000 characters) and hyperlinks
- Add custom banner image for the email (Max size 585 x 162 pixels. Maximum size: 1 MB).
- You can create different confirmation emails for different registration categories if you need to provide these attendees with unique information related to their category.
6. Click the SAVE button at the bottom or top of the screen to save your changes.