How do I customize my registration form?
Last Updated: Apr 22, 2021 12:19PM PDT
Being able to customize your registration form is very important because it allows you to place the questions in any order you want, delete questions that you do not need or require your attendees to answer certain questions. You may also choose which attendees will see and answer your questions based on their registration/ticket type. With that being said, let’s find out how you can customize your registration by following the steps below!
1. Log In to your Events.com account.
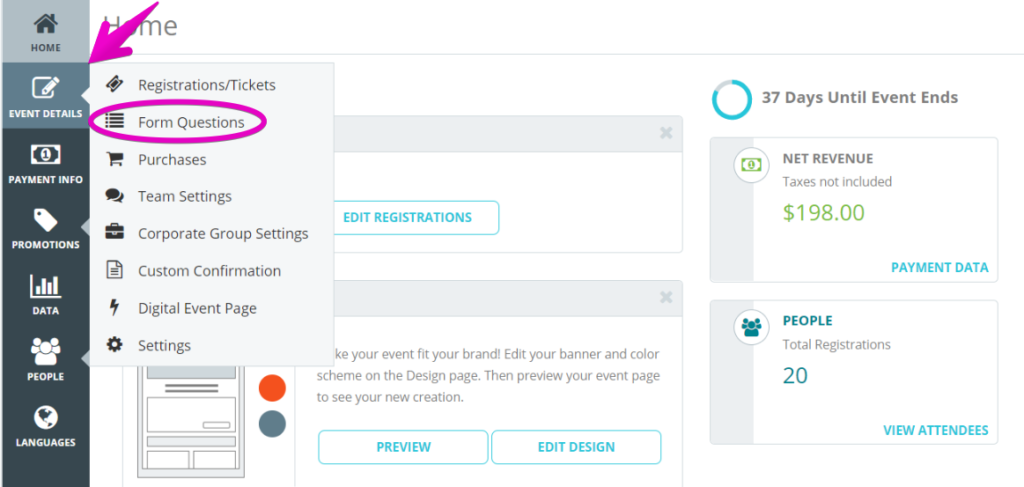
2. While in your event, click on EVENT DETAILS in your left side navigation, and then select Form Questions.

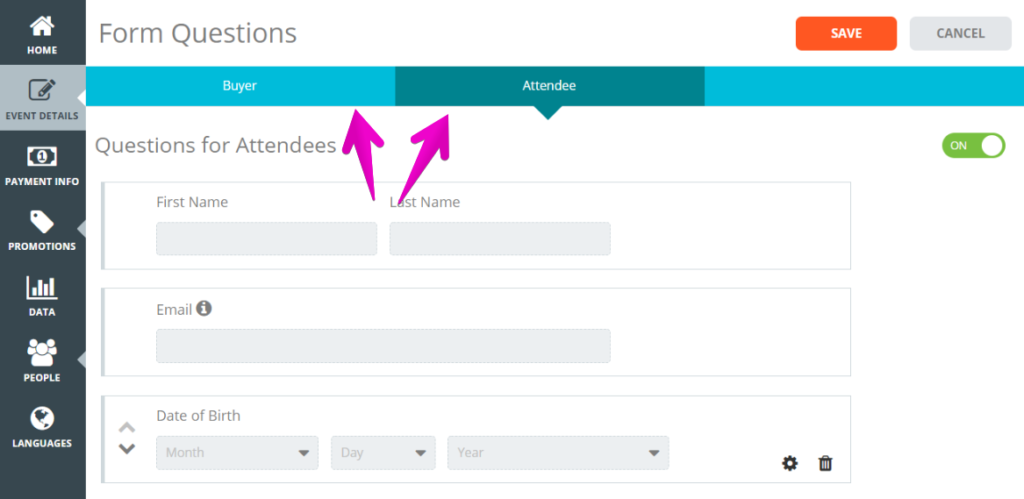
Note: There are two parts to Form Questions. You have the option of adding Buyer Questions which will appear once within an order and Attendee Questions which will be asked once for each attendee. If you would like to add to your Buyer Questions you can click on Buyer tab to see the form questions you can add. If you want to add to your attendee questions, click Attendee tab.

3. When questions are turned on for attendees, the standard form questions will be pre-selected. To change the orderof questions, click on the Up and Down arrows. To remove a question click on the trash icon. To access advanced settings on a question, click the settings (gear) icon.

4. If you want to add any custom questions, click the ADD QUESTION button at the bottom to add additional questions.
5. To add Section Headers to your registration form, click the ADD SECTION HEADER at the bottom.

6. Click the SAVE button to save your changes
Note: If you added Registrations to your event, the Attendee questions will default to ON because events that collect registrations usually need information from each attendee. If you added Tickets, the attendee questions will default to OFF. You can choose to change the default at any time.