How do I add a waiver?
Last Updated: Apr 15, 2021 08:12AM PDT
Waivers are a great way to provide a set of guidelines or rules that need to be followed at your event. When attendees click on the waiver box or enter their electronic signature, it stipulates that they have read the waiver and agree to abide by it. To add a waiver to your registration form follow these simple steps below!
1. Log In to your Events.com account.
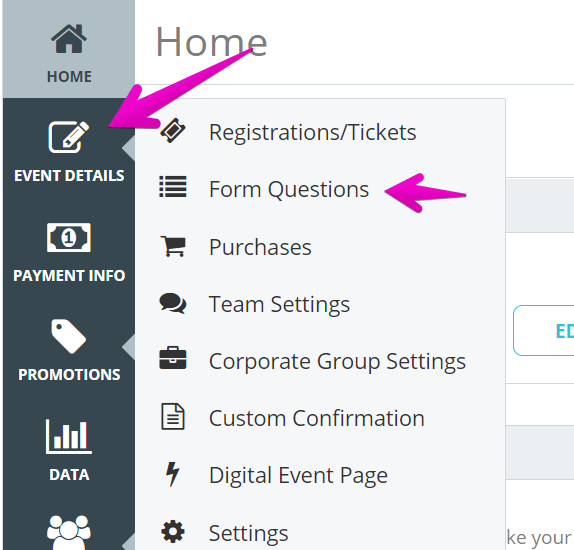
2. Click on the EVENT DETAILS icon on the left side navigation and select Form Questions.
3. Scroll to the bottom of your entry form and click ADD QUESTION.
 4. Select Waiver, under Other Questions.

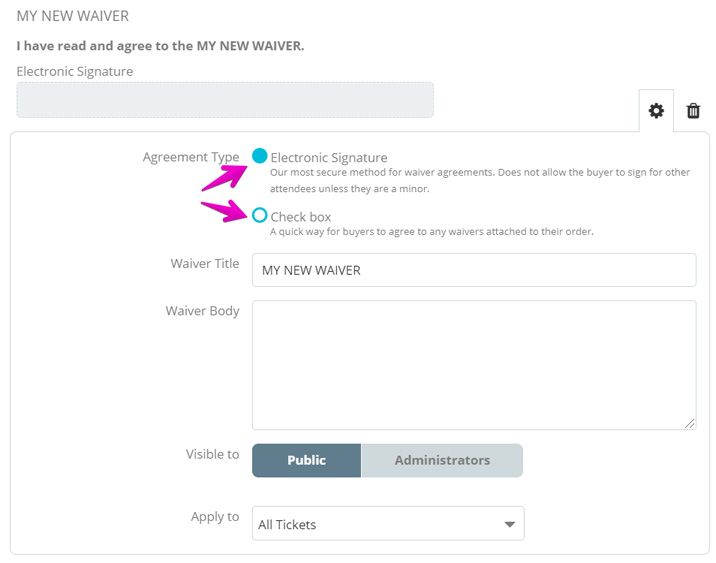
5. You have the choice of an Electronic Signature or a Check Box for the agreement type. Then you can give your waiver a different name which will appear to your attendees. Write, or copy and paste your waiver into the waiver body.
6. When you’ve finished adding your waiver, click SAVE at the top or bottom of the page before navigating to a new page.
Note: You can add as many waivers as necessary. To do this, simply repeat the steps above for each one. Waivers will always appear at the bottom of your form.