How do I add an image to additional purchases?
Last Updated: Apr 22, 2021 12:46PM PDT
Adding an image for each Additional Purchase that you offer can entice people to make more purchases.
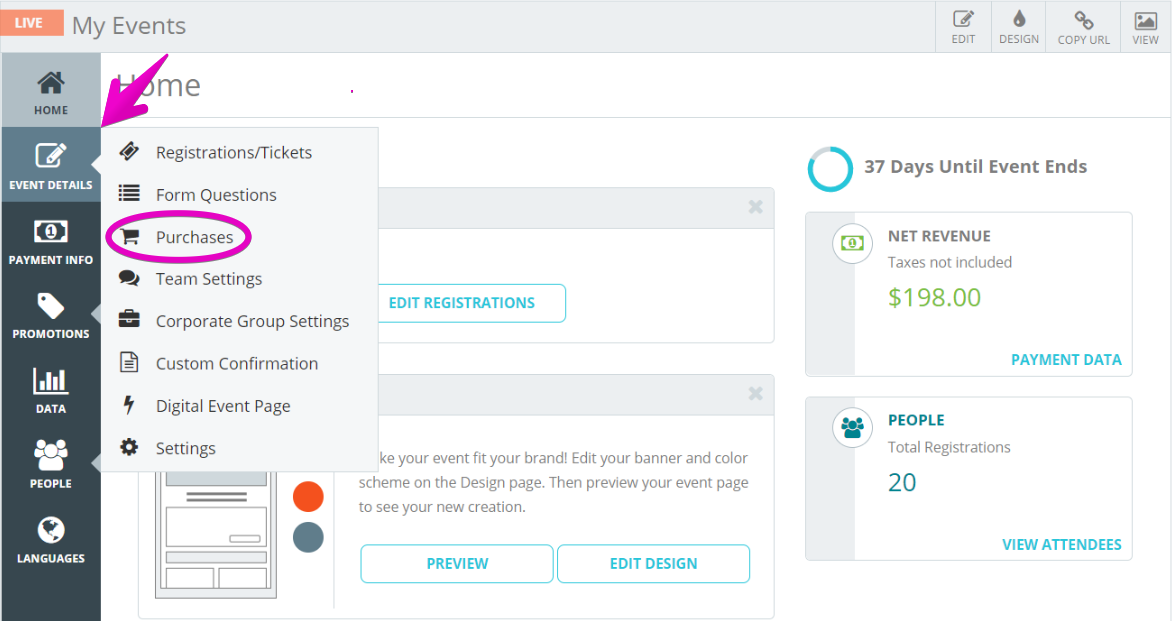
1. Log In to your Events.com account.
2. Navigate to the Purchase page by clicking EVENT DETAILS and selecting Purchases.
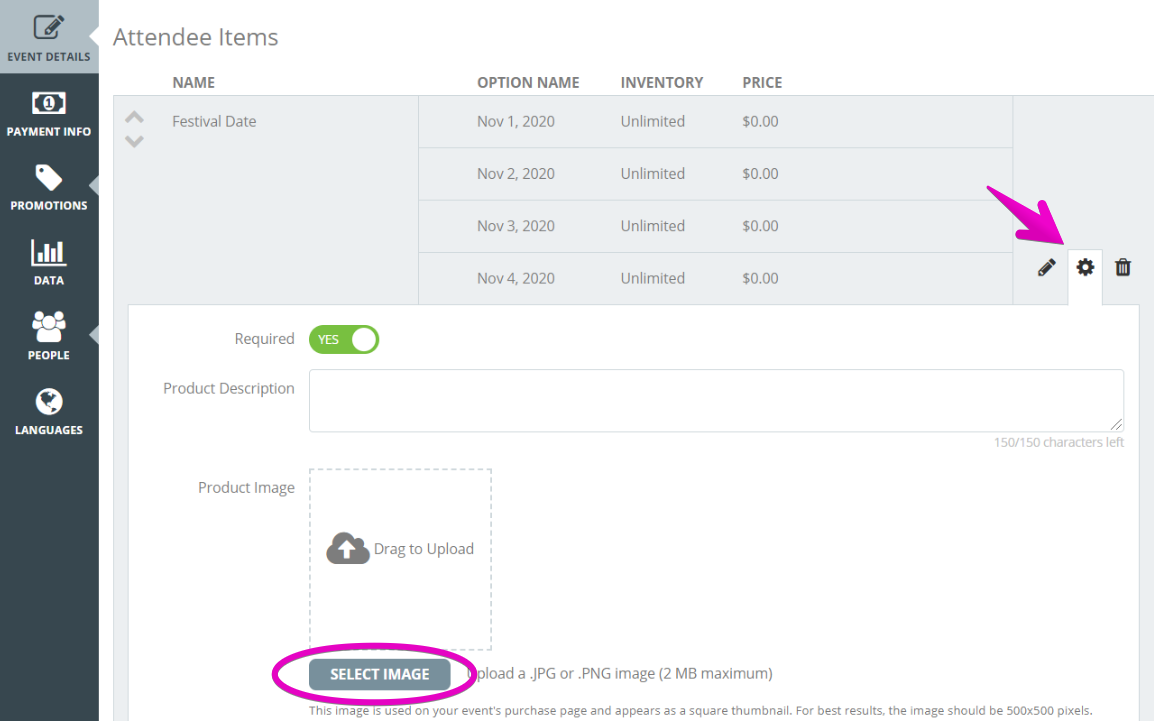
3. If you have not set up any purchases yet, you will need to add either an Attendee Item or Other Stuff by clicking the add option underneath your selection. Then click on the gear icon to the right of each item to open Settings.

4. Click SELECT IMAGE or drag and drop a .JPG or .PNG image (2MB maximum) to upload an image. Suggested size no smaller than 300 x 300. If your Item is required, a REQUIRED banner will appear at the top of the image so you will want to leave a blank space to avoid it from blocking your image.

Note: During registration, the image will have an enlarged view option.
5. Click SAVE to save your work