How do I upload offline registrations/tickets?
Last Updated: Apr 23, 2021 01:53PM PDT
Even when you set up online registration/ticketing, you may need to collect registrations offline. This could be through cash, check, or any other form of payment. With our bulk upload tool, you’ll be able to add all your offline registrants into your database. To enable the Attendee Upload option please start by contacting us at help@events.com. Once enabled, you can use the following steps to add them to your event.
1. Log In to your Events.com account and select the event for which you wish to do the upload.
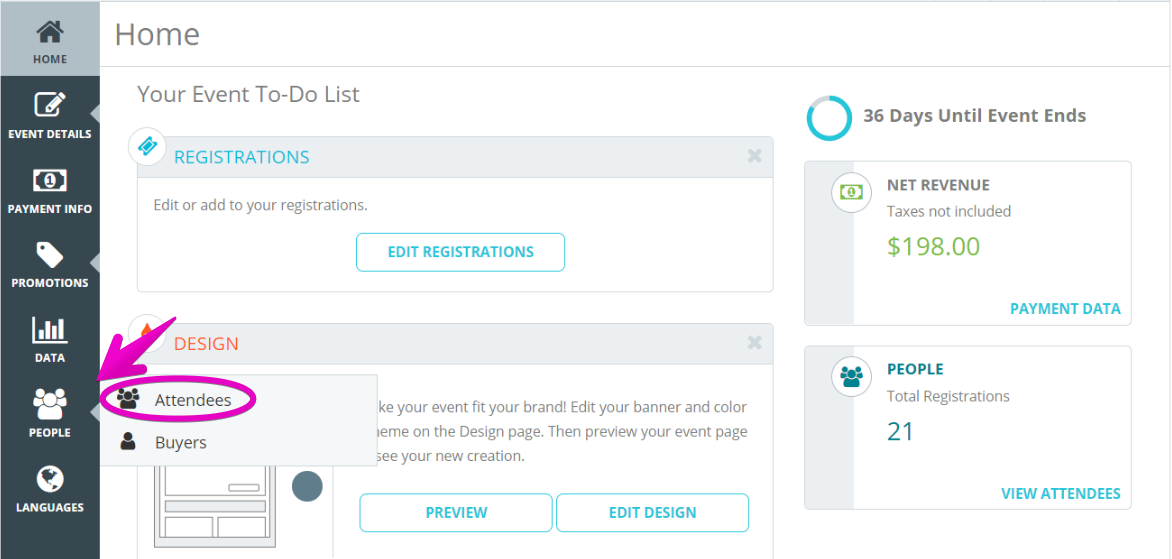
2. Click on PEOPLE in the left navigation, and then select Attendees
3. From the right, select the ATTENDEE ACTIONS and Attendee Upload

4. Then, Download your custom .CSV template. This ensures that the data you upload will have the same format as all the existing data on Events.com.
Note: Each row is an offline registrant or ticket holder, and will generate a new Registration/Ticket and order for your event.
5. Once you’ve downloaded your template, open it up.
You will see column headers including buyer information, form questions, additional purchases, and any other additional information you’ve added. You can fill out as much or as little as you want, but there are fields you must include – Buyer First Name; Buyer Last Name; Buyer Email: Registration/Ticket Type; Attendee First Name; Attendee Last Name; Attendee Email.
6. After saving the template with all your data, you will need to upload it in the system. Click BROWSE to choose the .CSV file you just created.
7. If you want send each registrant or ticket holder a confirmation email, switch the toggle to YES. The email is the same as though the recipient just completed an order through your page.
8. Click CONTINUE to start the upload. All rows that are entered correctly with the proper formatting will be uploaded successfully. To ensure that your file gets uploaded successfully, check out our Pro Tips!

Pro Tips:
- When you open a .CSV file in Excel, make sure to use the “Import Data as Text” function so that formatting is not lost. Check out this helpful article.
- Date of Birth values must be formatted as MM/DD/YYYY.
- Price paid values are in XXX.XX (with decimal) or XXX (with no decimal) format. (These are not necessary for the upload) *If you added a value it will be added to the org revenue.
- Quantity values are numerical.
- Values in Registration/Ticket Type must match EXACTLY to a Registration Name or Ticket Name in the event.
- Values in Additional Purchase or Form Question columns must match EXACTLY to a corresponding Option Name for the item. Their quantities must be set as 1.
- If a waiver was signed, place “Signed” in the waiver name column for the registrant/ticket holder.
- Values for Country must match EXACTLY one of the Country names in the attached PDF document.
- Values for State/Region/Province must match EXACTLY one of the names in the attached PDF document and be associated to the same Country as listed for the registrant/ticket holder.
- If the value is left blank for Price Paid for a Registration/Ticket or an included Additional Purchase, the Price Paid will be imported as $0.
Note: Review your file before uploading to make sure that all the information is correct. Turn on text wrap (expand the columns to display the full content), to ensure proper importing of data. You cannot remove offline orders.