How do I add restrictions to my purchases?
Last Updated: Apr 29, 2021 01:15PM PDT
When creating or editing an attendee item purchase, you can add custom Restrictions based on Gender, Age and/ or Location. Maybe you want youth (up to age 15) to have a special t-shirt, maybe there are male and female race categories or you want to offer something based on the person’s home address. You can apply these restrictions to your purchase. Then during the purchase flow, after asking the associated form questions, only eligible attendees will be able to make selections. For ineligible attendees, the questions will be hidden. Let’s look at adding those restrictions!
1. Log In to your Events.com account.
2. Navigate to the event in which you want to add or edit the Purchase Restrictions.
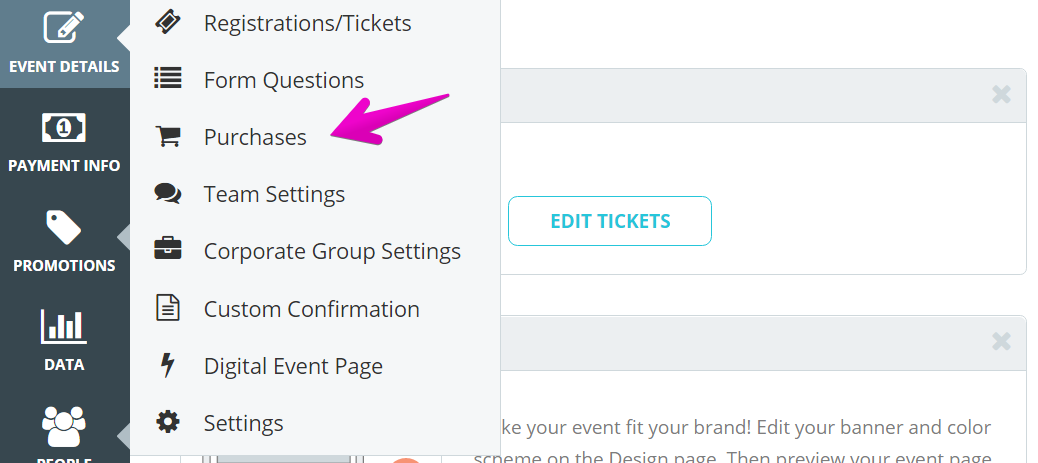
3. Click on EVENT DETAILS and select Purchases.
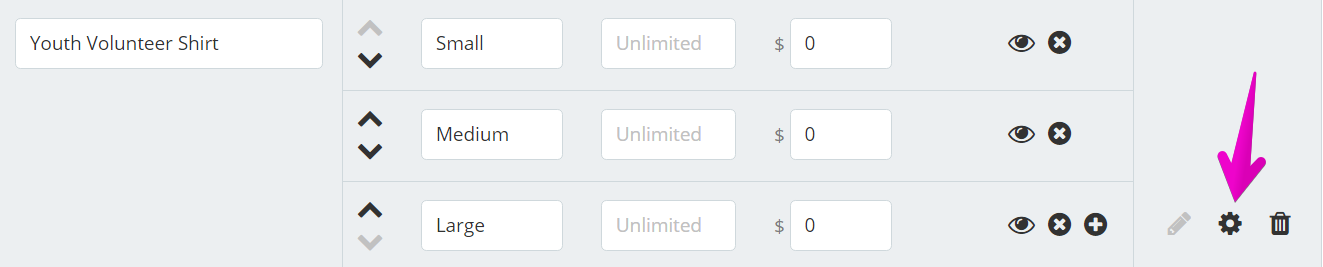
4. Click on the Setting (gear) icon on the purchase you wish to add the restriction to.
5. Toggle RESTRICTIONS to YES.
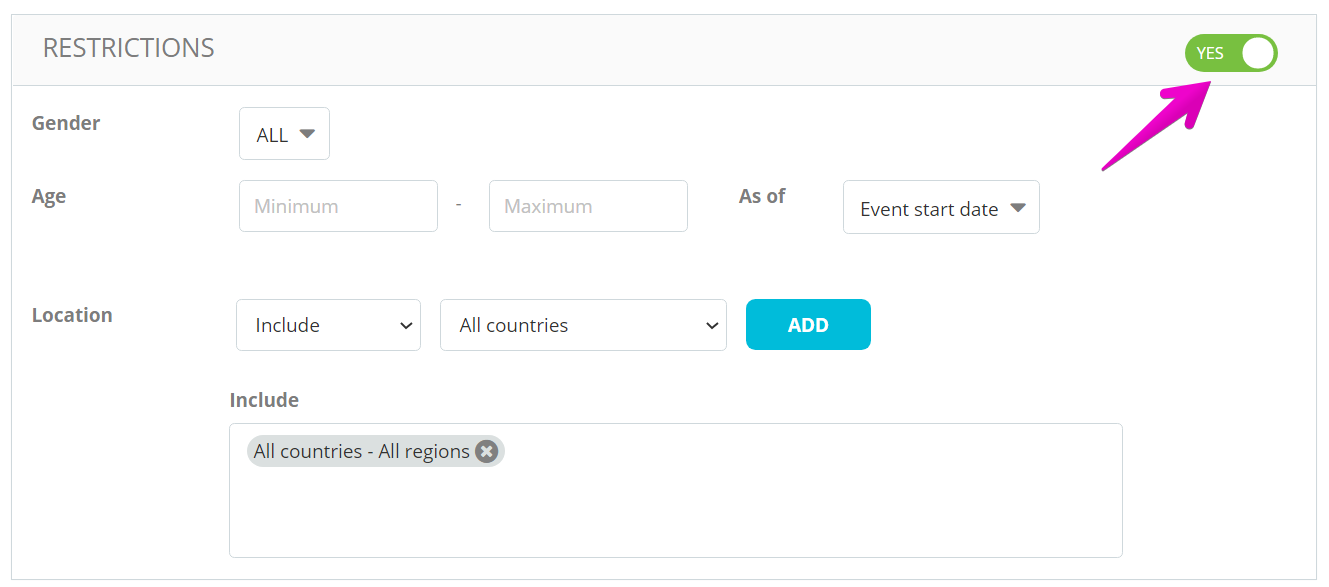
6. Now you can set a Gender, Age or Location restriction to your purchases. These restrictions will be based off of the attendees responses to the corresponding Form Questions: Gender; Date of Birth; Address. Make these are in your order form!
Pro Tips: Purchases are a great way to track inventory, prices can be set to $0 and Hidden if there’s no cost involved. If you are setting an age restriction, you can set an age as of the event start date, registration date, or enter a custom date.