How can I offer additional purchases that each of my event goers must select?
Last Updated: Apr 22, 2021 12:29PM PDT
You may have additional items for your event that each event goer must select to complete a purchase, such as a t-shirt size or parking pass. If so, you’ll want to set this up under the Purchases tool. All items added to this portion of the registration flow will be listed for each registrant, and may or may not have a price associated to them. It is important to note that each registrant may only select each item once. For example, if you list a free t-shirt with the registration, each registrant may only select one size.Â
Follow these steps to add a purchase to one or more registrations in your order form:
1. Log In to your Events.com account.
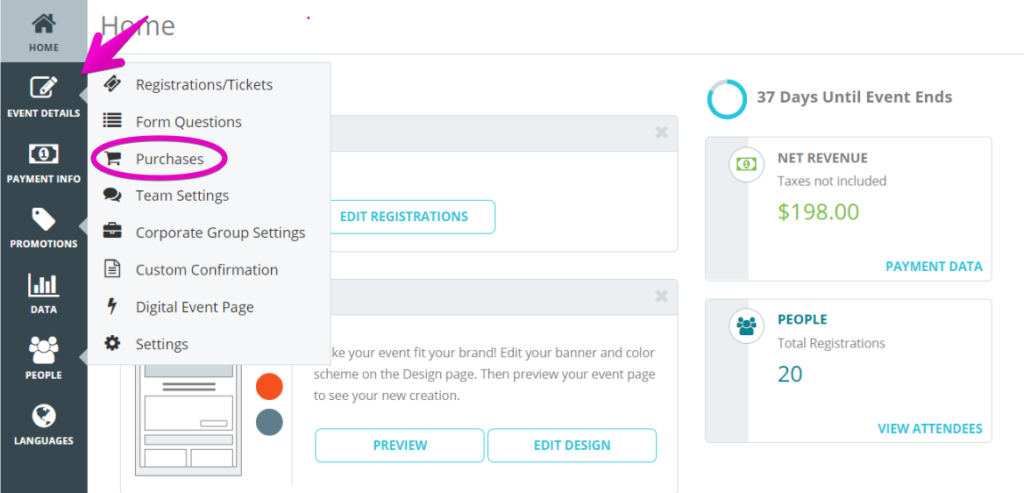
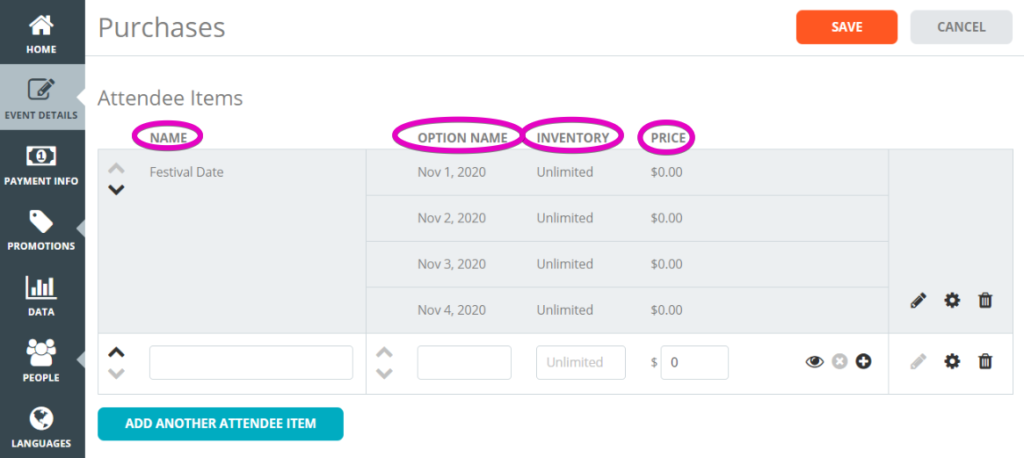
2. Click on EVENT DETAILS on the left side of the screen, and select Purchases. Then, click on ADD ANOTHER ATTENDEE ITEM to get started.

3. Give your purchase and option names (e.g. Purchase: Hat and Options: Black, Gray, Blue). Set the inventory limits for each option, so that you do not oversell your available inventory. Set the price for the option if it is not free.
4. Add more purchase options by clicking on the “plus” + icon. You can set a different name, price and inventory limit for each purchase option by repeating steps 2 through 4.

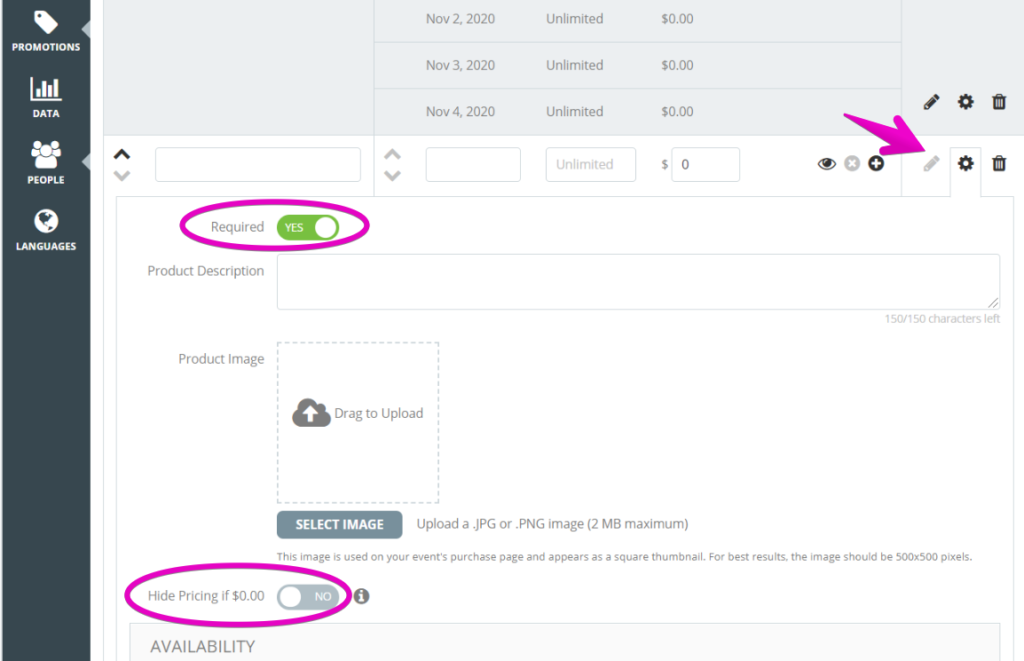
5. The Advanced Settings (gear icon) allows you to toggle Required to YES or NO (Whether an attendee will be stopped to answer the question), add Product Description, Product Image, the option to Hide Pricing and to customize the Availability.Â

6. Click SAVE to save your work.
Pro Tips: It is a good idea to add an image for any item that you offer or sell to get people excited about wearing your awesome brand. See How do I add an Image to Additional Purchases? for instructions on adding images for additional purchases. Remember, items are associated to registrations and inherit their availability restrictions. If a registration is no longer available, the associated purchase(s) will not be either.Â