How do I use invitations?
Last Updated: May 5, 2021 01:22PM PDT
Events.com’s invitation tool is a great way to invite attendees on a more personal level. The system allows you to create invitations embedded with a unique link (different from your public event link). This is great for inviting VIPs, sponsors, staff members, and more. *If this feature is not available in your account please contact us at help@events.com
There are several parameters you can customize per invitation. For example, if you want to add a special discount for those invited, or if you want to ensure that only those whose first name and last name appears on the invitation, can redeem it.
1. Log In to your Events.com account.
2. As an organizer your first screen will be your organization data. You can select between your LIVE, DRAFT and COMPLETED events and choose the event you would like to set up special invitations for.
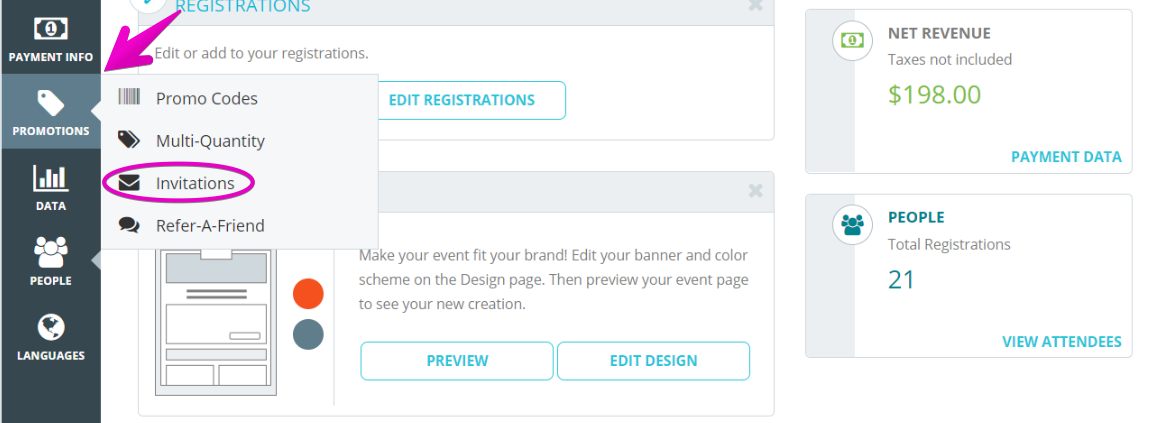
3. Go to PROMOTIONS in the left navigation, and then select Invitations.
4. Name your invitation (for reference purposes). Then, click the Settings (gear) icon to open the Advanced Settings. Here you can specify the Valid Dates for this invitation; the registration or ticket type(s) you wish it Applies to; any Discount you’d like to offer to the invitee (a discount is not required); and the Uses Per Invite field allows you to set the amount of registrations that will be available for purchase to the invitee. *Uses Per Invite cannot be edited for a previously sent invitation. You can add the contact list again through Add Invitees to send the same invite (with the updated uses) or we recommend sending a new invitation.

These invitation details will be included in the email sent to invitees. You can also select if the invitation will be restricted. If you toggle this option to YES, the invitation will pre-populate and lock in the name of the invitee on the registration form from the information used in the upload (step 3).
You may also view how many invitations have been redeemed by clicking PROMOTIONS / Invitations, and you will see the totals here

5. Add a custom message to the invitation. Feel free to add images, hyperlinks, etc. Make it personal!
6. We provide you with a template you can download in two different formats, so adding your invitees is easier on you. After saving your completed template, click BROWSE to find your file, and then UPLOAD. The spot will update, to display a confirmation message that the upload was a success.
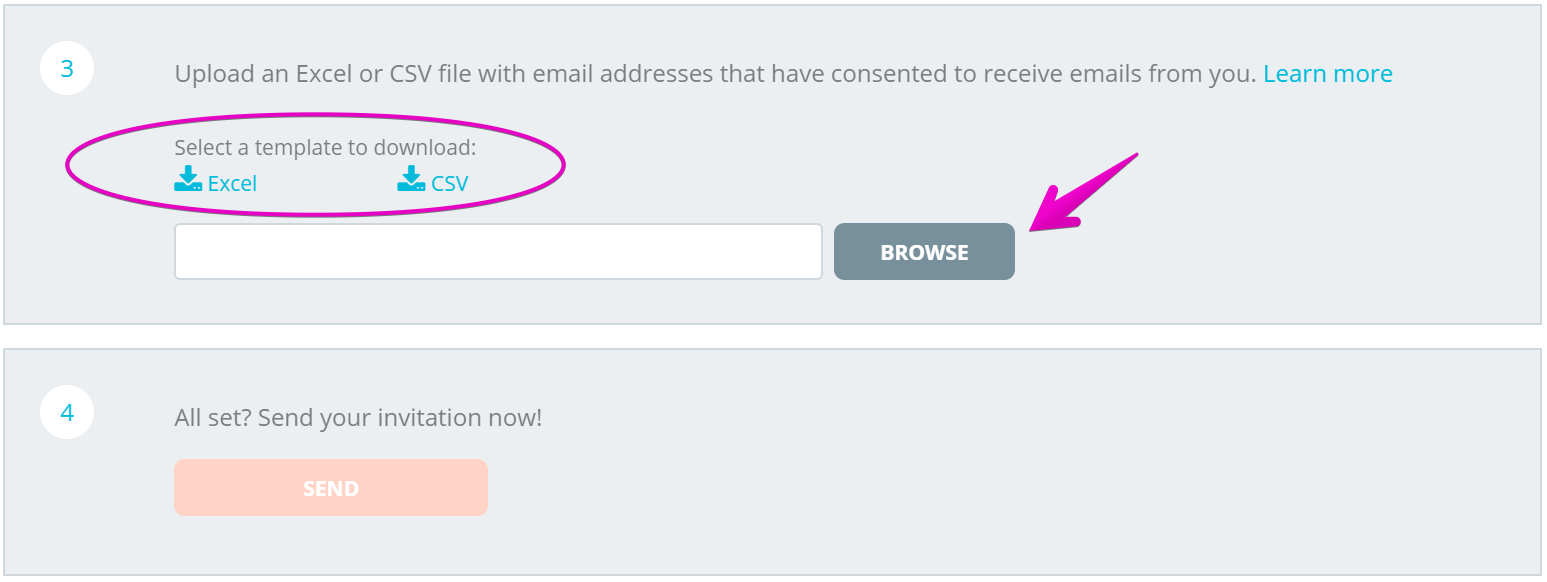
7. SEND the invitation!
If the need arises, and you want to send this invitation to a new group of people at a later time, check out this helpful article – How do I add new invitees to an existing invitation?