How do I create tickets or registrations?
Last Updated: Apr 22, 2021 01:21PM PDT
Creating tickets or registrations is very easy to do! Tickets usually collect minimal info whereas a registration often collects a lot of info but it’s up to you which you’d like to use. This will be asked when you’re creating your event draft. For more on the differences between tickets and registrations click here. Now let’s get started on creating your tickets or registrations by following the steps below!
1. Once your event draft has been created, you can add your Ticket or Registration for sale.
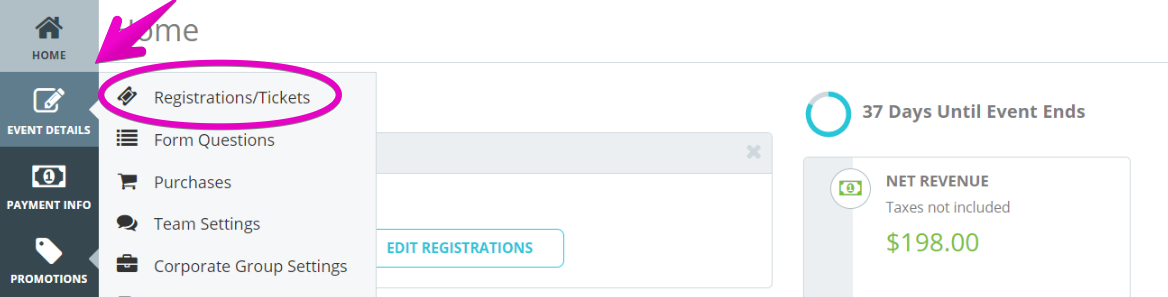
2. Select EVENT DETAILS on the left hand side menu and select Registrations/Tickets.
3. There are settings that will apply to all of the registrations/tickets. Event Capacity, Currency and a short cut to the Settings Page for fees and taxes. The default is for fees to be charged on top of the ticket price, and no taxes. If you change your mind about whether to sell Tickets or Registration, you can click the Change to Registrations (Tickets) at any time.
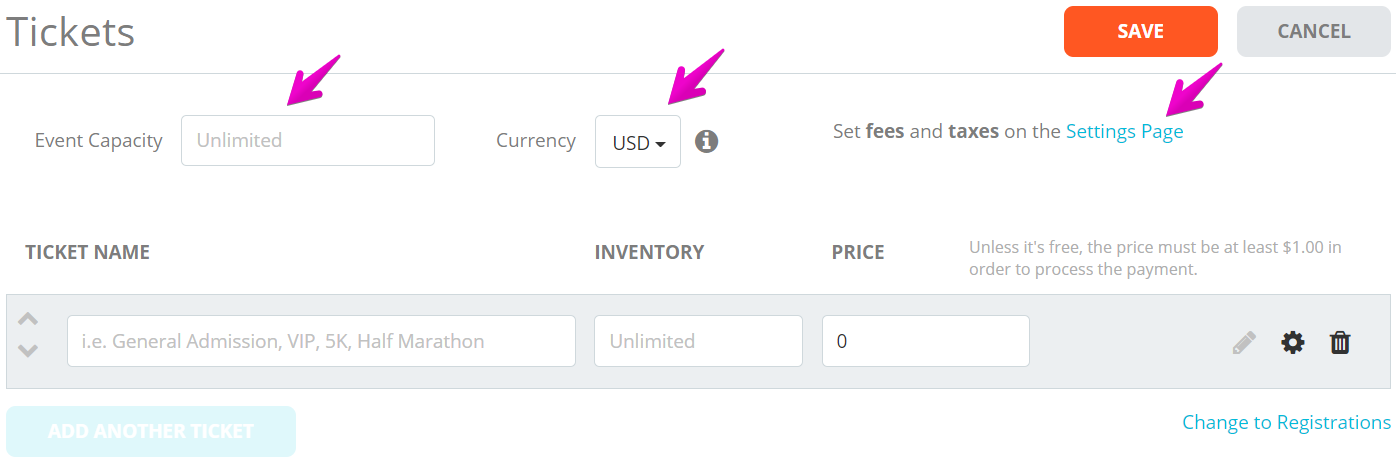
4. Give the Ticket a Name, add Inventory (if applicable, blank is unlimited) and Price. Clicking the gear icon will open the Settings.
There are several options for customizing your tickets. Description will appear on the event page under the name of the ticket.

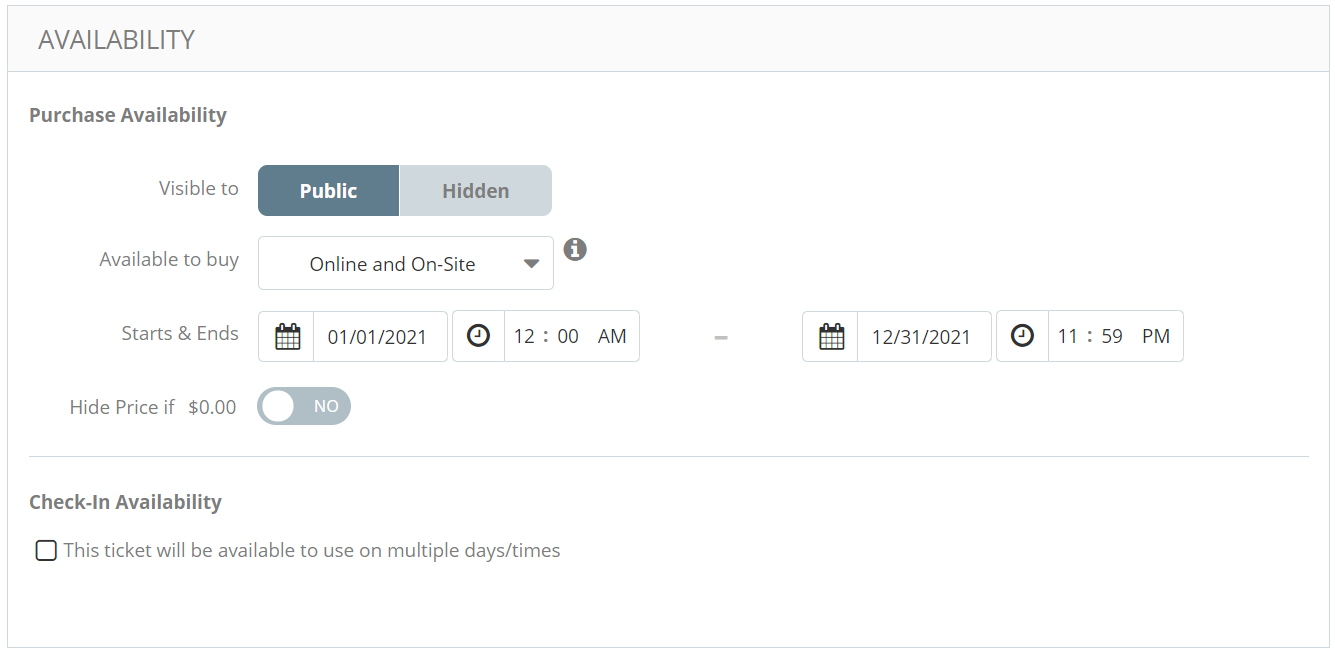
The Availability section gives options for where the ticket will sell, and between which dates. If you’re hosting a free event, you can toggle to Hide Price if $0.00.
5. There are additional optional features that you can use by toggling them on.
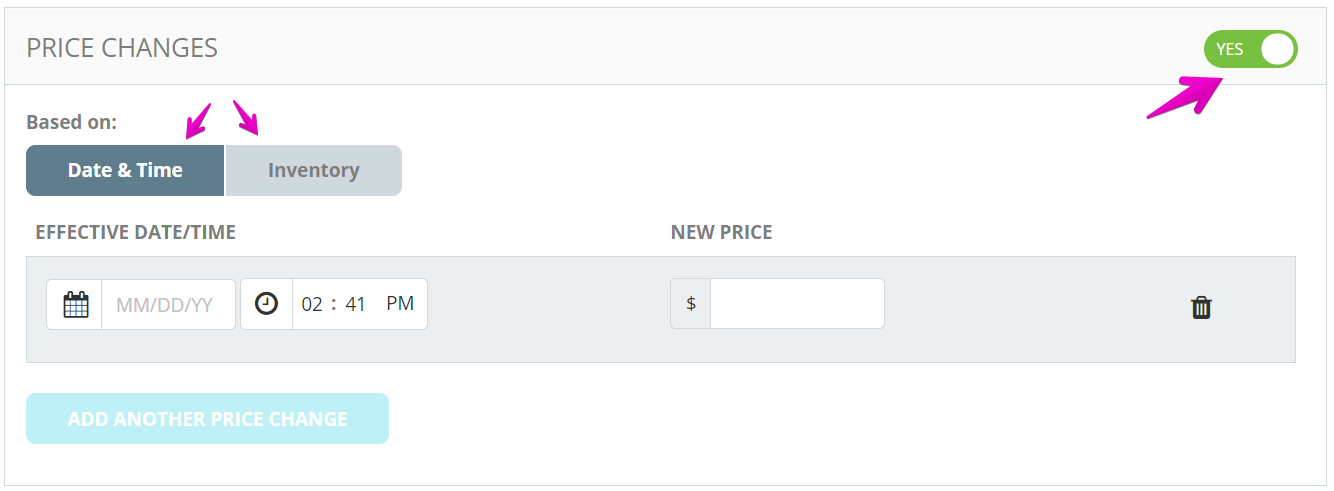
Price Changes can be set in two different ways. Date & Time: by adding the start date of the new price and the new price. Inventory: by adding the number of the starting ticket with the new price. You can add multiple Price Changes.
Restrictions on People gives you the options of adding restrictions by Gender, Age, Min and/or Max Purchase per Order and Location. You can also toggle on an Access Code. If you’re protecting a ticket/registration with an access code, someone will need to enter the access code before they can select the ticket/registration.

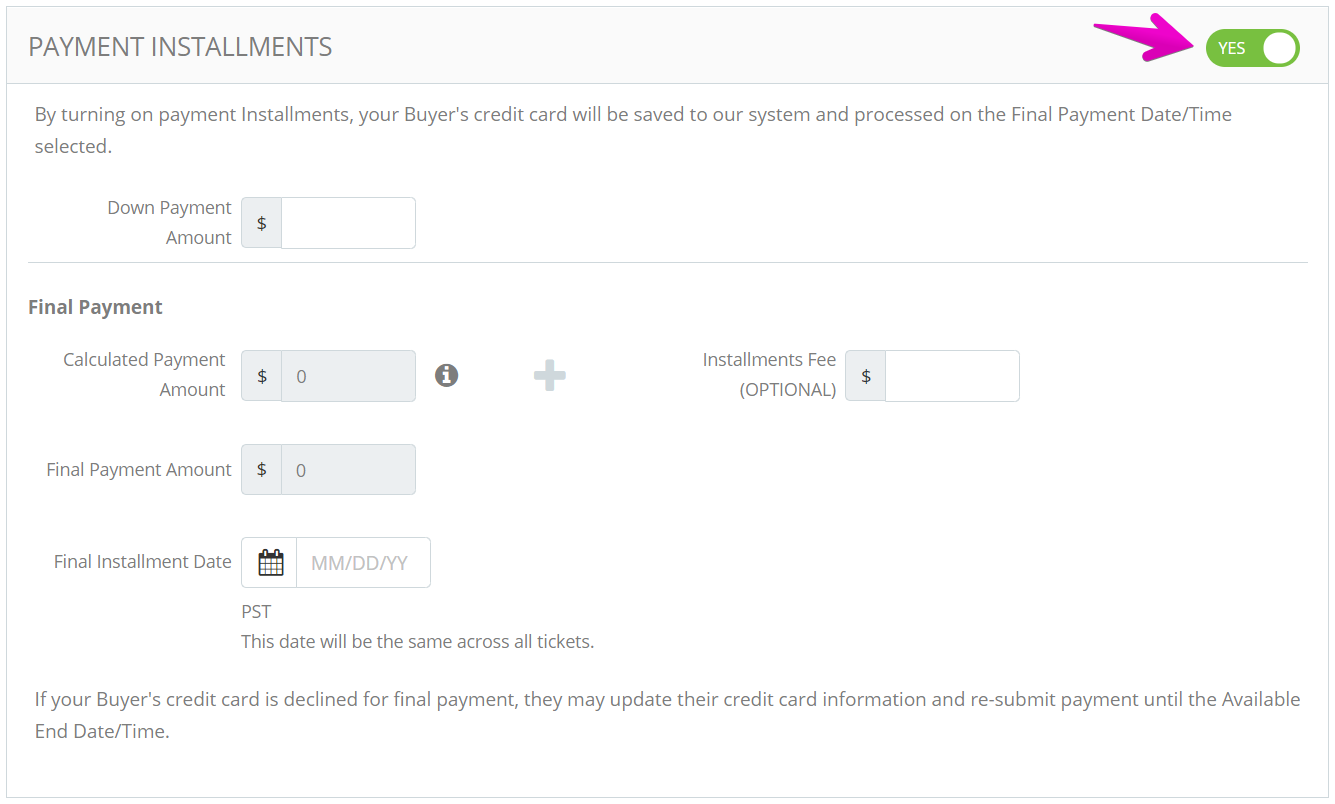
Payment Installments may not appear available to you right away, but please reach out to our customer success team at help@events.com to inquire about the feature. It allows you to split the order payment into two for your Attendees. For more info on Installments, click HERE.
6. To add more ticket/registration types click Add Another Ticket (or Add Another Registration) and customize their Settings as needed.

7. When done, click SAVE to save your work.
Pro Tip: When in Preview mode any ticket/registration purchases will not result in orders or registrations. You can test your form without adding any test data to your event.