Webinars have come a long way from being a “nice-to-have” to an essential tool in nearly every event organizer’s toolkit. Whether you’re leading a product demo, hosting a virtual panel, rallying donors for a cause, or building community around a niche topic, webinars give you a direct line to your people.
But let’s be honest: hosting a smooth, engaging webinar isn’t always easy. If you’ve ever stared at a blank attendee list five minutes before go-time or scrambled to fix a glitch while presenting, you’re not alone. These things happen, even to the pros.
That’s where this guide comes in. We’ve pulled together webinar best practices to help you plan, run, and wrap up your sessions with confidence. From tech checks to engagement tricks, we’ll walk you through simple, actionable tips that make your webinars feel less stressful and more successful, for you and your attendees.
Let’s get into it.
Step 1: Plan your webinar like a pro
A great webinar doesn’t just happen; it’s built on smart planning. The more you prepare up front, the smoother everything will run on the day, and the more valuable your session will be for your attendees. Think of it like setting the stage before the curtain rises.
Start by asking yourself one simple but powerful question: Why am I hosting this webinar? Your answer is the foundation for everything else, from the way you market the event to how you engage attendees. Your goal could be building brand awareness, driving sales, educating your community, or rallying support for a cause. Whatever it is, make it crystal clear so you can measure success later.
Once your goal is set, shift the focus to your audience. Who are they? What challenges are they facing right now? What would motivate them to attend and stick around until the last slide? This isn’t about creating content you want to deliver; it’s about creating content they want to experience. If you know your attendees are short on time, for example, you might prioritize quick wins and actionable takeaways over long, theory-heavy segments.
Timing can also make or break your webinar’s attendance. Avoid scheduling conflicts with major events or industry conferences, and consider your audience’s time zones, especially if they’re spread across regions. Midweek sessions (Tuesday through Thursday) often work best for business audiences, but always check your past data to see when your community tends to engage most.
Finally, lock in your agenda. A clear plan keeps you on track and sets expectations for attendees. Break your session into segments, assigning estimated times to each, and include room for live Q&A. If your webinar runs longer than an hour, build in a short break, even just a few minutes, to give people a chance to stretch, grab a drink, or post on social media.
If you want to save time without sacrificing quality, the Events.com AI Agenda & Run of Show Generator can create a professional, well-paced agenda in seconds. Just input your topic, goals, and session length, and it will map out your flow, complete with timing suggestions and interactive touchpoints.
Pro tip toolbox:
- Start promotion early to build momentum and keep registrations coming in.
- Map every detail in the Events.com Run of Show tool so nothing gets missed.
- Build anticipation with teaser videos, sneak peeks, or guest speaker highlights.
- Confirm speakers early and share the run of show so they’re fully prepared.
Step 2: Get your tech setup right
Your technology should support your webinar, not cause last-minute stress. When your tech works seamlessly, it fades into the background, allowing your content and delivery to shine.
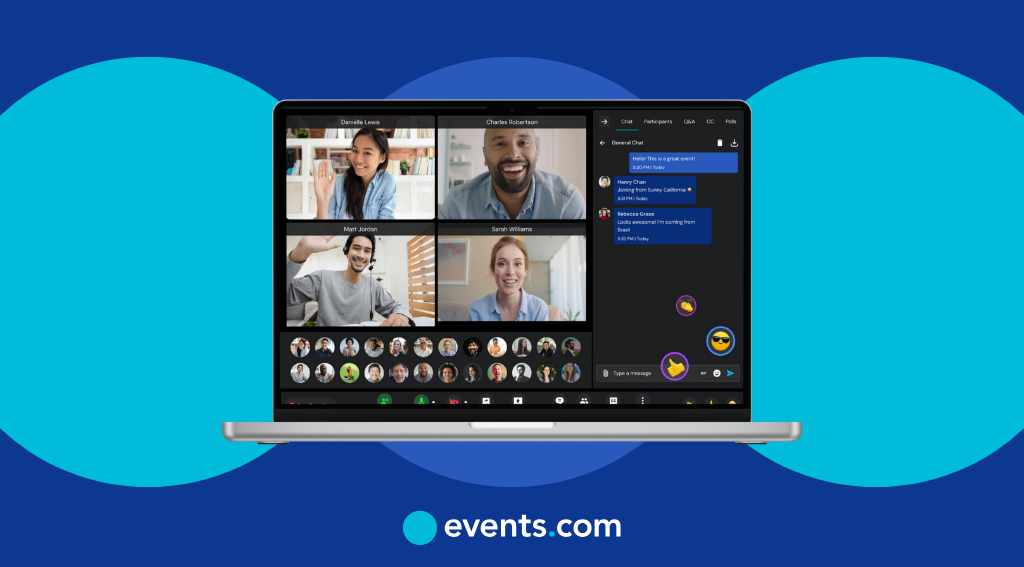
Start with the right virtual event platform. Choose one that’s reliable, easy for attendees to join, and has the features you actually need, whether that’s polls, breakout rooms, Q&A tools, or high-quality screen sharing. Events.com Virtual is built with virtual event engagement in mind, offering interactive features and a smooth joining process so both hosts and attendees can focus on the experience, not the instructions.
Once your platform is set, run a thorough tech check, ideally more than once. Test your camera, microphone, screen sharing, and poll functions. Pay attention to your lighting and background, too. A well-lit, clutter-free space instantly improves professionalism and keeps distractions to a minimum.
If your webinar involves multiple speakers, schedule a rehearsal. This gives everyone a chance to get comfortable with the platform, carry out a pilot webinar, and iron out any issues before going live. It’s also a good time to agree on cues, for example, how you’ll signal to a co-host that it’s time to launch a poll or share a slide.
Speaking of co-hosts, having a tech support backup is one of the best decisions you can make. While you focus on presenting, they can manage the chat, monitor attendee questions, and troubleshoot any issues. This division of roles helps keep the session running smoothly even if a hiccup occurs.
Finally, don’t underestimate the power of reminders. Reduce no-shows by sending calendar invites and automated emails ahead of the event. Include clear instructions for joining, plus tips for getting the most out of the webinar.
Pro tip toolbox:
- Send a “tech check” email to all speakers with platform login details, timing, and a checklist of what to test.
- Share an attendee guide with screenshots of how to join, use the chat, and answer polls in Events.com Virtual.
- Have a backup plan, a spare headset, a second device logged in, and pre-recorded slides in case of internet issues.
- Test from the attendee side to make sure everything looks and sounds the way you intend.
Step 3: Craft content that clicks
Even the most reliable tech can’t save a webinar with flat content. If your presentation isn’t engaging, your attendees won’t be either. Great content keeps people listening, interacting, and, most importantly, coming back for future sessions.
Start strong. The first few minutes set the tone for the entire webinar, so grab attention right away. You might open with a thought-provoking question, a surprising statistic, or a short story that ties into your topic. For example: “Did you know that 60% of webinar attendees drop off within the first 10 minutes if the content doesn’t hook them?”
- Balance value and visuals: Your slides should enhance your message, not overwhelm it. Keep text minimal and use high-quality visuals like photos, infographics, or short videos to illustrate your points. On Events.com Virtual, you can share multimedia seamlessly, switching between slides, videos, and live demos without breaking the flow.
- Vary your format to hold attention: Mix in live polls, short Q&A segments, or even breakout discussions to give attendees a reason to stay engaged. If you’re running a panel, alternate between speakers rather than letting one voice dominate for too long. It keeps energy levels up and makes the session feel more dynamic.
- Make it relatable: Use real-world examples tailored to your niche, whether it’s “for local 5K organizers” or “for nonprofit fundraising teams.” The more your audience sees themselves in your examples, the more likely they’ll connect with your message.
Perhaps the most important thing is to pace yourself. Avoid rushing through your material to “get it all in.” It’s better to deliver fewer, well-developed points than to cram too much information into one session. Your run of show should already build in time for interaction, stick to it.
Pro tip toolbox:
- Use polls strategically to transition between topics and gather instant feedback.
- Incorporate attendee names in examples or Q&A responses to make the experience personal.
- Record content clips for repurposing in social posts or post-event emails.
- Ask for audience input early to set the tone for two-way conversation.
Step 4: Keep attendees engaged from start to finish
A webinar is not a one-way broadcast, it’s a live experience. The goal is to keep attendees leaning in, not zoning out, from the moment they log on until the closing remarks.
Engagement begins before you even share your first slide. As people join, greet them personally, mention their names, and invite quick participation, like sharing where they’re tuning in from or answering a fun icebreaker question. On Events.com Virtual, you can use the built-in AI Icebreaker generator to instantly generate questions and help attendees feel more at ease.
Once the session starts, give your audience regular opportunities to be involved. Launch polls in real time to check opinions, test knowledge, or gather insights you can reference later. Displaying results instantly not only validates participation but also sparks conversation.
Leverage the chat strategically. Instead of letting it run in the background, prompt attendees to share quick thoughts or reactions. If you have a co-host or moderator, they can monitor the flow and surface key questions for you to address during natural pauses.
Encourage networking during or after your webinar by using Events.com Virtual’s AI Matchmaking feature. It pairs attendees based on shared interests, helping them form connections beyond the main presentation. This is especially effective for webinars with breakout discussions or community-building goals.
To prevent energy dips, build short, interactive activities into your run of show, whether that’s a two-minute word cloud, a rapid-fire Q&A round, or a breakout room chat. These moments break up the listening time and re-energize the group.
Light gamification can also boost participation. Keep it simple, small prizes for the best question, fastest poll answer, or most insightful comment work well. The goal is to create a sense of fun without pulling focus from your core content.
Pro tip toolbox:
- Use AI Icebreakers to start conversations before the content begins.
- Schedule engagement moments in your Events.com AI Agenda & Run of Show.
- Leverage AI Matchmaking to help attendees connect with like-minded peers.
- Mix interaction types, polls, chat prompts, and activities—to suit different styles.
Step 5: Follow up like you mean it
A webinar’s real impact often happens after the closing slide. Post-event communication is where you turn interest into action, deepen relationships, and keep your brand fresh in attendees’ minds.
Begin with a prompt thank-you email, ideally within 24 hours. Keep it warm and concise, thanking them for their time and including something useful: a replay link, your slide deck, or bonus resources mentioned during the session. On Events.com Virtual, you can make this even easier by exporting attendee lists and engagement data directly for segmented outreach.
Use attendee behavior to shape your messaging. Someone who participated actively in polls or chat is more likely to respond to an invitation for a deeper conversation. Someone who registered but didn’t attend might need a quick “Here’s what you missed” recap alongside the replay. By segmenting your follow-up, you keep your messages relevant and respectful of people’s time.
This is also the perfect moment to capture feedback. A short, well-designed survey can uncover what worked, what could be improved, and which topics attendees want next. Feedback collected through Events.com Insights can be connected to your CRM, helping you track patterns over multiple webinars.
Don’t limit your follow-up to email. Share key takeaways or standout moments on social media and tag speakers or attendees (with consent). This keeps your content visible to a wider audience while reminding attendees of the value you provided.
And while you have their attention, invite them to take the next step, whether that’s registering for another event, joining your community, or booking a meeting. Make the path forward obvious, with a single clear call-to-action in every follow-up.
Pro tip toolbox:
- Automate follow-ups with Events.com Promote for consistent timing and segmentation.
- Offer exclusive extras, such as extended Q&A recordings or VIP invites, to those who attended live.
- Repurpose top webinar moments into short videos for social sharing and email teasers.
- Tie feedback to future planning so attendees see their input reflected in upcoming sessions.
Step 6: Turn your webinar into a lead generation machine
A well-run webinar doesn’t just deliver value, it builds a pipeline of qualified leads. With the right structure, you can capture attendee information before, during, and after your session, then use it to fuel future marketing strategies and sales efforts.
Start with your registration page. This is often your first interaction with potential attendees, so make it feel polished and purposeful. Keep the design clean, highlight the value of attending, and make the form simple to complete. According to Webinar Landing Page Best Practices, every field you add reduces conversion rates, so only ask for what you truly need. On Events.com Virtual, you can create landixng pages optimized for both signups and data capture, while integrating directly with your CRM.
During your webinar, look for natural opportunities to collect additional insights. Polls, Q&A submissions, and chat interactions can reveal attendee priorities and pain points, gold for lead qualification.
Post-event, segment your leads based on behavior. Someone who attended the full session and asked multiple questions is likely warmer than someone who dropped off after 15 minutes. With Events.com Virtual insights, you can rank leads by engagement level and send targeted follow-ups that speak directly to their interests.
Consider offering gated bonus content, like an in-depth guide, extended Q&A recording, or VIP networking invite, to encourage further data sharing. This not only nurtures the lead but also keeps them engaged with your brand.
Finally, connect your webinar data to your broader marketing funnel. Whether that’s passing leads to your sales team, enrolling them in a nurture campaign, or inviting them to your next event, the goal is to keep momentum going until the relationship turns into action.
Pro tip toolbox:
- Design your landing page with a single, clear value proposition and minimal form fields.
- Track in-webinar engagement in Events.com Virtual for lead scoring.
- Use gated content post-event to encourage deeper engagement.
- Review Insights regularly to refine your lead qualification process over time.
Step 7: Host like a human
You can have the sharpest slides, the best platform, and a flawless run of show, but if you sound robotic, you’ll lose your audience fast. People don’t connect with perfect scripts; they connect with other people.
The easiest way to humanize your webinar is to speak like you would in a real conversation. That doesn’t mean being casual to the point of sloppy, it means letting your personality show. Share small anecdotes, react naturally to what’s happening in the chat, and let your tone shift with the content. If something funny happens, laugh. If a poll result surprises you, say so.
Use your attendees’ names whenever you can. On an immersive platform such as Events.com Virtual, the participant list and chat make it easy to spot names and respond directly. A simple “That’s a great point, Jamie” instantly makes the experience feel more personal.
Don’t be afraid to go slightly off-script if the moment calls for it. If a lively discussion breaks out in the chat, give it space. Some of the most memorable webinar moments happen when you lean into what the audience is giving you instead of rigidly sticking to the plan.
Body language matters too, even on camera. Smile, look directly into the lens, and use natural gestures. These small cues help bridge the gap between a physical room and a virtual one.
Remember that your role isn’t just to deliver information, it’s to make attendees feel seen, valued, and included. Whether you’re presenting to 10 people or 1,000, that connection is what will bring them back next time.
Pro tip toolbox:
- Use attendee names in responses to create a one-to-one feel.
- React in real time to polls, chat comments, and unexpected moments.
- Leverage Events.com Virtual’s interactive tools—polls, Q&A, and AI Icebreakers—to keep the tone conversational.
- Practice speaking to the camera lens so attendees feel like you’re addressing them directly.
Make your next webinar a hit
Successful webinars follow a plan, not luck. By using these webinar best practices, from smart event planning and engaging content to real-time interaction and purposeful follow-up, you can create sessions that your attendees remember for all the right reasons.
With Events.com Virtual, you have everything you need to run smooth, interactive, and results-driven webinars, all in one place. Book a demo on Events.com today and see how easy it is to host webinars that connect, convert, and keep people coming back.
Frequently asked questions about webinar best practices
- What are the best practices for hosting a successful webinar?
Plan your session with clear goals, create engaging content, choose reliable tech, and keep attendees involved with polls, chat, and interactive moments. Follow up promptly after the event to maintain connections.
- How do I choose the right webinar platform and technology?
Look for a platform that’s easy to join, offers the features you need (like polls, breakout rooms, and Q&A), and can handle your audience size. Events.com Virtual is designed for interactive webinars with built-in engagement tools.
- What is the ideal length for a webinar?
Most webinars perform best at 45–60 minutes, including time for Q&A. Longer sessions should include short breaks or interactive segments to maintain attention.


