How do I set up a virtual event?
Last Updated: Mar 2, 2021 08:12AM PST
Creating a virtual event on Events.com is very similar to creating an in person event. Please follow along to get set up right away!
1. While on Events.com click Create Your Event.
2. In the Basic section, select a category that best represents the type of event you’re hosting.
3. In the Details section, you can consider including “Virtual” or “Webinar” in your Event Name to be consistent with your branding.
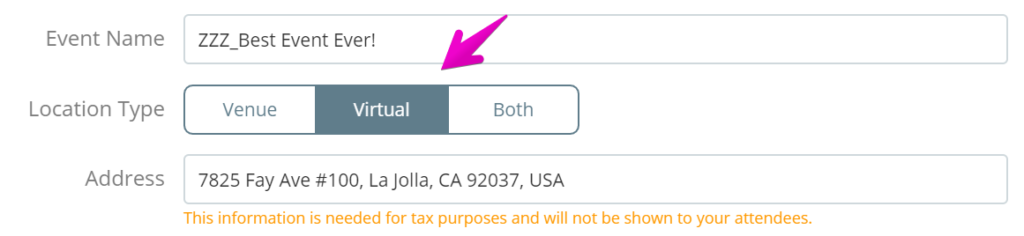
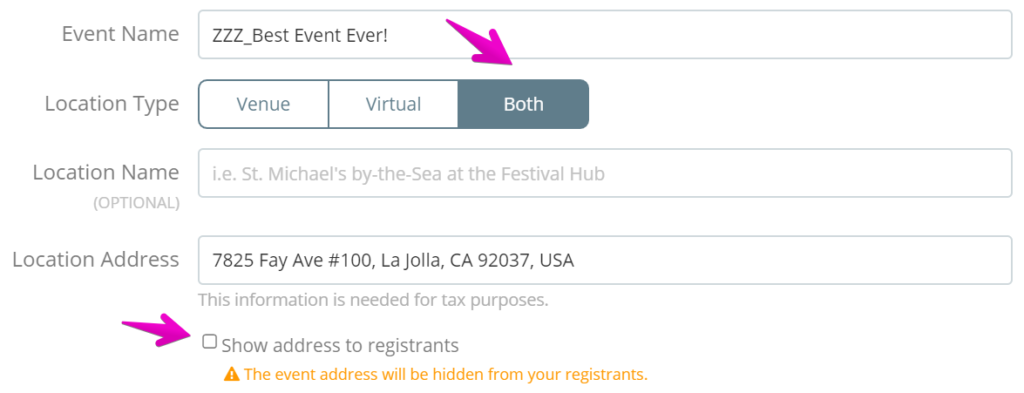
For Location Type, you can choose between Venue (indicating a physical location), Virtual or Both. Due to new Marketplace Facilitator regulations, the address needs to be collected for tax purposes even in the case of Virtual but it does not have to be shown on your event page.
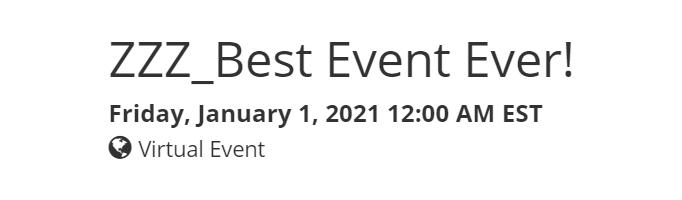
When you select Virtual as your location type. This will display a Virtual tag to your event page.
If you have a virtual and physical event taking place you can select Both. This gives you have the option to show your address or keep it hidden. You have the option to add a virtual tag directly onto the registration/ticket as discussed in step 5.
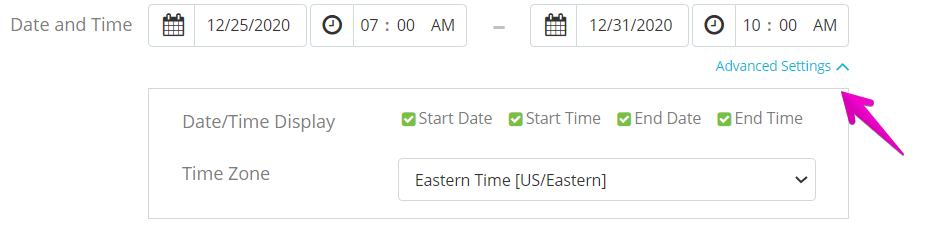
You can also select Advanced Settings on the date and time to hide specific dates and times for your event if you need.
Use the Event Description to be very clear what your attendees can expect and include as many details as possible:
- Are you mailing them a race kit?
- Will you be providing them with a link for webinar access?
- What does the kit contain?
- When will it be shipped out?
- How long will it take to receive?
- Who is speaking in the webinar?
- What topics will be covered?
- What are the live start and end times? (This may be important to mention the time zone if you expect international attendees)
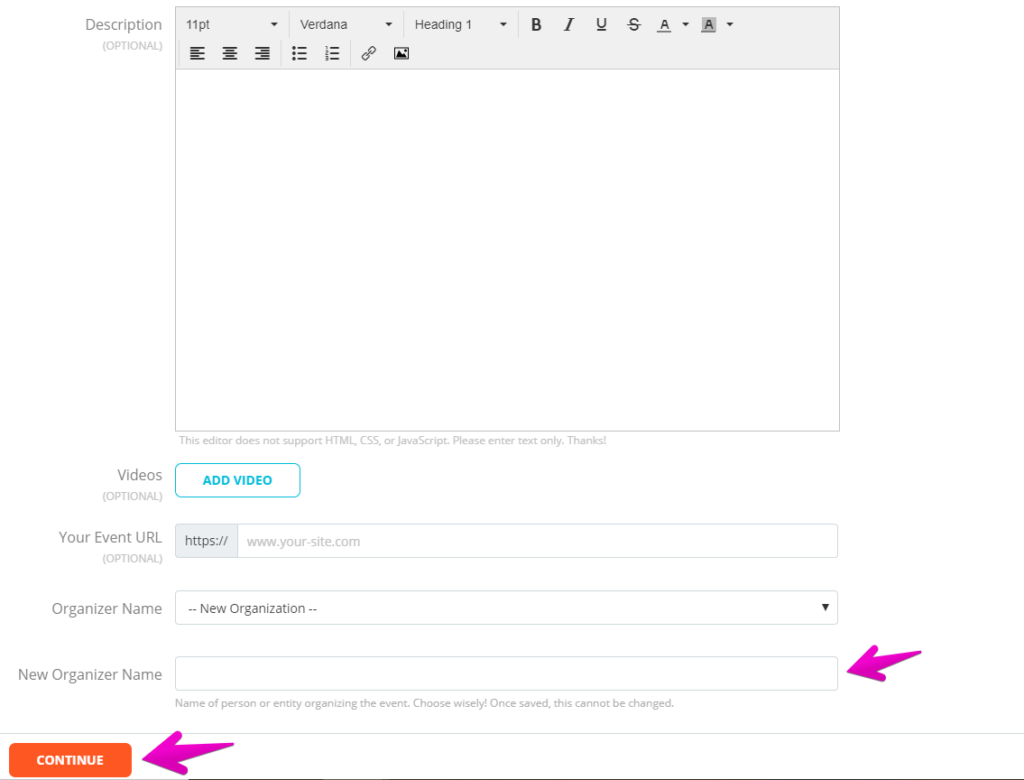
You can add hyperlinks, images and format your text. Get creative with important information by changing the color of your text, or size of your headlines.
If you have a welcome video this is the perfect place to add it, along with your website. It’s important to have your brand consistent and available throughout.
If this is your first event on Events.com, or if you’re branding your virtual events under a different organization name, here is where you can add your Organization Name. This can’t be easily updated, so choose wisely! Click CONTINUE when finished.
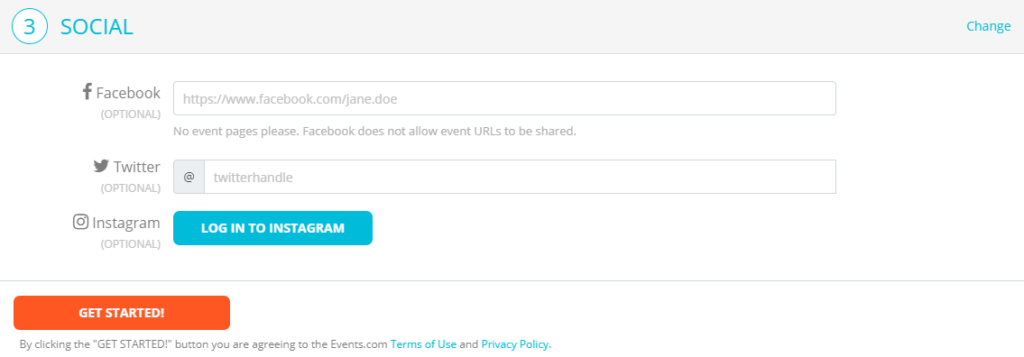
4. Enter in your social media. This is a great reference point to gain followers or encourage social participation. Plan to share important hashtags and campaigns with your attendees. Clicking GET STARTED! creates the framework of your event.
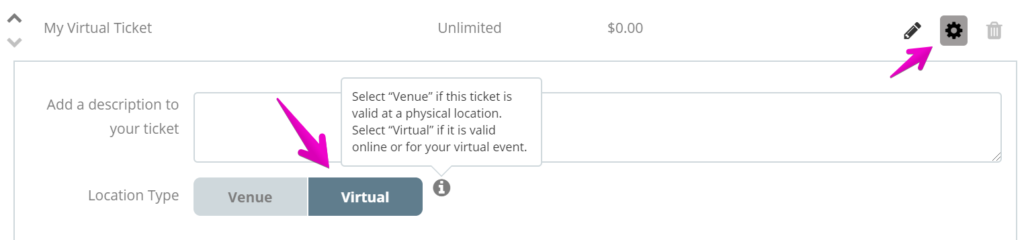
5. Creating Registrations/Tickets. Set up a registration/ ticket type best suited for your attendees.
If you selected Both as the Location Type, you will have a setting within your Registrations/Tickets to add a Virtual tag to your specific Virtual registration/ ticket.

You can still offer Teams, or Corporate Buying if they fit your audience. Here are some great articles for additional reference:
How do I set up registrations/tickets for my event?
Can I support teams or groups in my event?
What are corporate groups, and how can I use them?
Use Form Questions to collect any necessary info from your participants such as shipping address, or what industry they work in, why are they interested in your webinar – How do I add form questions? You may want to add a waiver for Rules & Policies having each person agree to the terms of your Virtual event (or acknowledge that it is a virtual event).
Consider what you’re including in your registration/ ticket price. If you are offering a race kit, will the shipping be included? International shipping? If you’d prefer to add an international shipping premium as an add on, the best option is to set it up as a purchase. Please refer to this article for a walk through on setting up purchases – How do I set up purchases to upsell my event goers?
6. You’ve covered all the info needed for your purchase form, now you should consider your post communication. One way is through your confirmation page message and confirmation email. Do you have links that you want your attendees to monitor (ie for access to your webinar)? Do you have a video community link to share? Do you want to give them the schedule so they know what to expect? Do you have any social groups for them to join? Or social media hashtags you want them to use?
How do I customize my confirmation emails?
The other way, and this can be done at any time, is to send them an invitation. This gives another opportunity to send a branded message to your attendees and send them any additional content to enhance their experience.
How do I use invitations?
7. Last but not least, ensure that you’ve connected your payment info. You’ll want to make sure that these details are in place for you to get paid! After you’ve finished here, you can Go Live! And Get Virtual!
How do I set up my own standard Stripe account?
If you’re brand new to the virtual event space, here are some tips for creating a memorable virtual event!
- Create a printable bib or attendance/finisher certificates.
- Consider items you could provide to be shipped – bibs, special cards or tickets, medals, t-shirts. Anything to add value.
- Use our custom confirmation email builder to coordinate the social media presence you’d like to see. (Event hashtags, selfie suggestions showing how you participated)
- Introduce a contest to encourage online participation and create excitement.
- Film short videos to share with your attendees, tips and tricks to prepare or to build on their skills for future experiences.
- Or anything you think will represent your brand and excite your attendees!
If you’d like to discuss your virtual event strategy or have any questions about getting it set up, contact your dedicated Customer Success Manager, or email us at help@events.com. We’ll be happy to help you finalize your virtual event today!